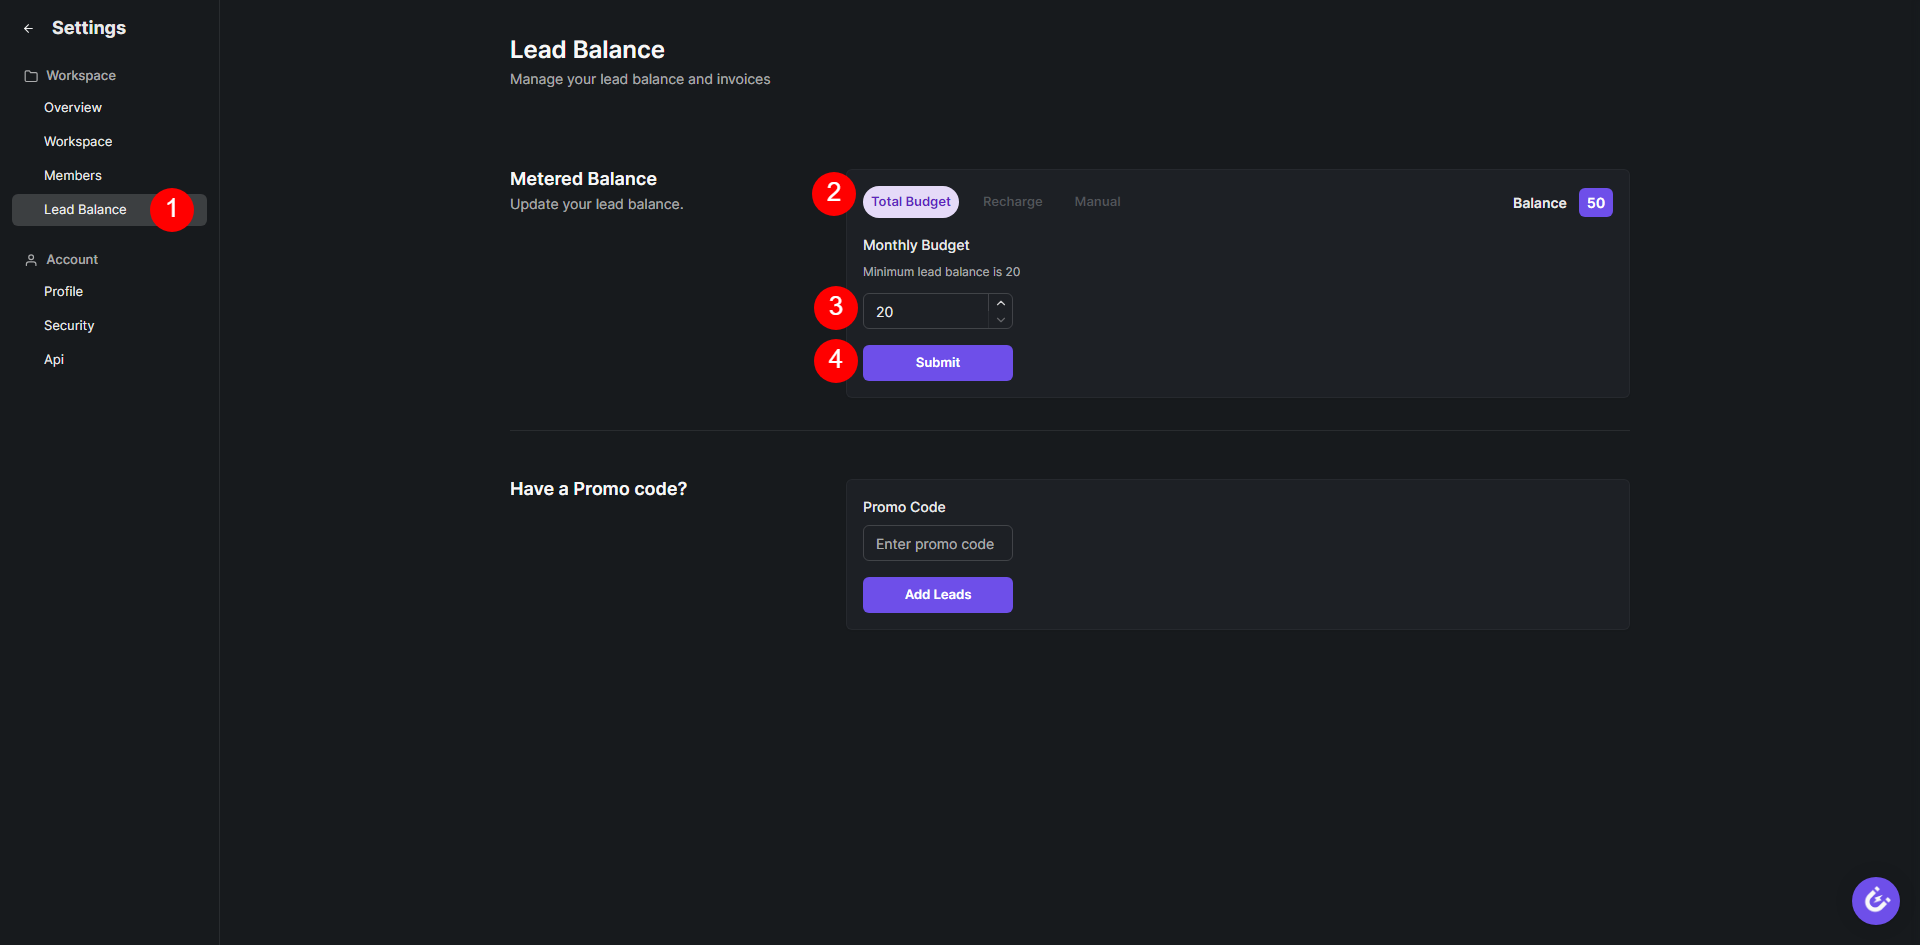
LeadMagnets allows you to control your lead generation expenses by setting an account lead budget. This feature lets you determine the maximum amount of credits to use, helping you manage costs effectively. Follow the steps below to set a lead budget for your account and stay in control of your lead magnet campaigns.
Step-by-Step Instructions:
Navigate to System Settings
Click on the profile icon in the upper left corner of your LeadMagnets dashboard. From the dropdown menu, select Settings to access your account's system settings.
Select the Lead Balance Menu
In the settings menu, click on the Lead Balance option to manage your lead credits and budget.
Toggle to the "Total Budget" Tab
On the Metered Balance section of the Lead Balance page, toggle to the Total Budget tab. This is where you’ll be able to set your account-wide lead budget.
Set Your Lead Budget
In the provided field, enter the total budget amount you wish to allocate for lead generation. This budget will cap your total spending or lead usage based on the number of credits you specify.
Submit and Save
Once you’ve set your desired budget, click Submit to save the changes. Your lead budget will now be in place, and you’ll receive notifications if you approach your budget limit.

Tips for Setting a Lead Budget:
Monitor Usage: Keep an eye on your lead usage to ensure you stay within budget and make adjustments as necessary.
Adjust as Needed: You can always revisit this section to increase or decrease your lead budget based on campaign performance.
Stay Notified: Make sure you have email or platform notifications enabled to alert you when you approach your budget limit.
Conclusion:
Setting an account lead budget in LeadMagnets is a great way to manage your lead generation costs and ensure you stay within your desired spending range. By following these steps, you can easily control the total credits used across your campaigns and optimize your lead strategy efficiently.